
BVA's Getting Started Guide: First-Time Setup
Getting Connected Navigation >> First Steps | Simulator Setup | Pilot Client | Configuring vPilot
The first step is to configure P3D for flying on the network. From within your existing flight, select Options > Settings > Sound from the menu:
In the "Settings - Sound" dialog, diable the "Voice" option.
Note: Disabling "voice" disables the default ATIS (you won't need this because ATC will broadcast the ATIS for you). However, if you decide to fly in a multiplayer server, or if you wish to fly with the default ATC in single player, you will need to re-enable this option in order to hear air traffic control.
Then, under "Windows Sound Devices", select the audio device you wish for "Primary Playback Device". This audio device is used for aircraft and background sounds from the simulator. Most users set their speakers. You do not need to select anything from the "Voice" drop-down.
Once finished, the window should look like this:

From the settings menu on the left, select "General" under "Simulation". Disable the "Show message log in ATC menu" option under 'Air Traffic Control':
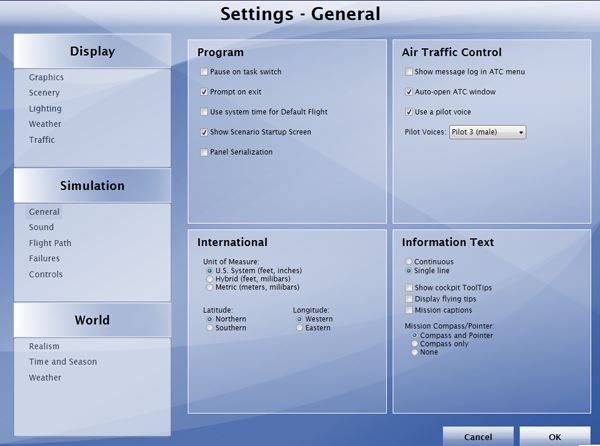
You may also wish to un-check the "Pause on task switch" option. This prevents P3D from pausing your flight when you switch to the focus to a different window.
Select "Traffic" under "Display" and set the "Airline traffic density" and "General aviation traffic density" sliders to 0%. This ensures that you will not see any P3D-generated aircraft while flying on the network:

Click "OK" to save the settings.
| Is P3D configured as shown above? |
| Yes: continue to the next step |
| Skip this section and explain where I can find controller frequencies, determine who to contact, and start flying |