
BVA's Getting Started Guide: First-Time Setup
Getting Connected Navigation >> First Steps | Simulator Setup | Pilot Client | Configuring vPilot
If you run FSX in full screen mode, you may wish to run vPilot on a second, networked computer. This allows you to interact with vPilot without having to change screens on your flying computer. Click here for more information on running vPilot on a remote computer.
Once vPilot is installed, run it. There are a few initial settings to configure in vPilot before connecting to the network for the first time.
Click "Settings":
In the "Settings" dialog, on the "Network" tab, enter your personal VATSIM credentials, including your CID, password, name, and home airport. Select a server of your choice; all servers are connected. Most people select the server that is closest to where they live. If you are experiencing connection trouble, try a different server.

We encourage pilots to select their desired options on the "Notifications" tab. For more information on these settings, visit vPilot's Documentation.
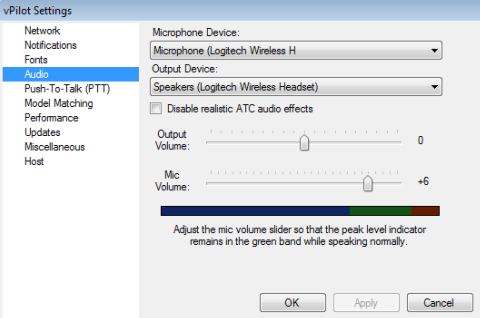
Next, click the "Audio" tab.
On this tab:
Once you have completed the settings above, the window should look like this:
Next, click the Push-To-Talk (PTT) tab to set a button or joystick/yoke key that can be used to talk to ATC. To do so, click the "Set new PTT Key or Button" button, then activate the key or button you wish to use as a PTT. You can set a keyboard key, or use a joystick/yoke command button.
Please note that if you run FSX 'as administrator', and you are using a keyboard PTT key, you should also run vPilot 'as administrator'. Otherwise, the PTT keystrokes may not be read by vPilot.
| Are you ready to move to the next section? |
Yes: Explain where I can find controller frequencies, determine who to contact, and start flying |