Pre-Flight Checks: Part 2A (MSFS)

Summary
Part 2A of the Pre-Flight Checks will guide Microsoft Flight Simulator (MSFS) users through preparing their simulators for connecting to the VATSIM network. If you're a X-Plane user, refer to Part 2B. If you're already up and running on VATSIM, feel free to move directly to Part 3.
Simulator Setup
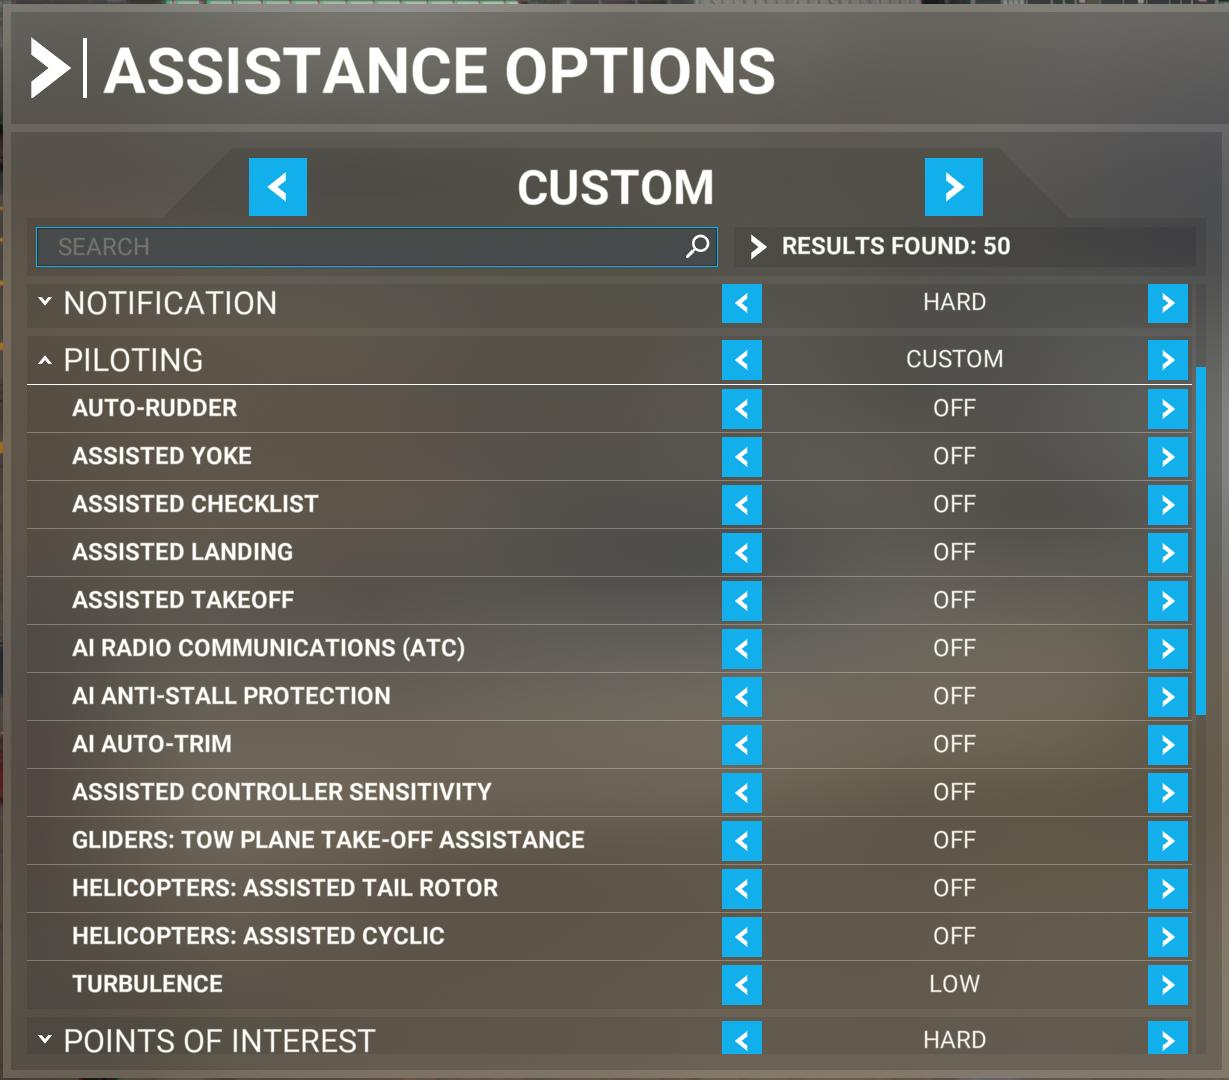
The first step is to disable the default "ATC Voices" to prevent you from hearing the simulator-generated ATIS when you tune to a VATSIM ATIS frequency. For similar reasons, you'll also want to disable AI control for ATC. If you don't make these changes, you'll hear both the simulator-generated ATIS as well as the controller's ATIS playing on the same frequency.
(The game-generated ATIS normally does not suggest accurate/realistic runways anyway. While ATC is offline on VATSIM, you can use the ".metar" command to retrieve the latest airport weather or access official weather at aviationweather.gov. We also provide Suggested Runways at KBOS for use when ATC is offline.)
From the main menu, choose "Options":
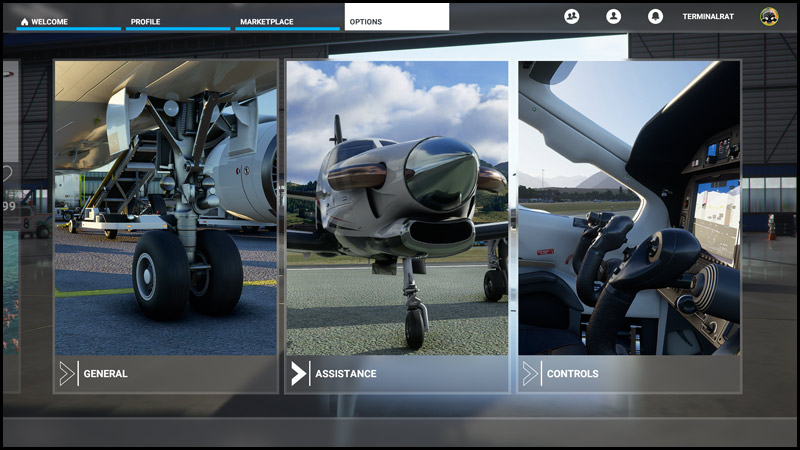
In the "Assistance" menu, under "Piloting", turn "AI Radio Communications (ATC)" off:
Then, under "User Experience", turn "ATC Voices" off:
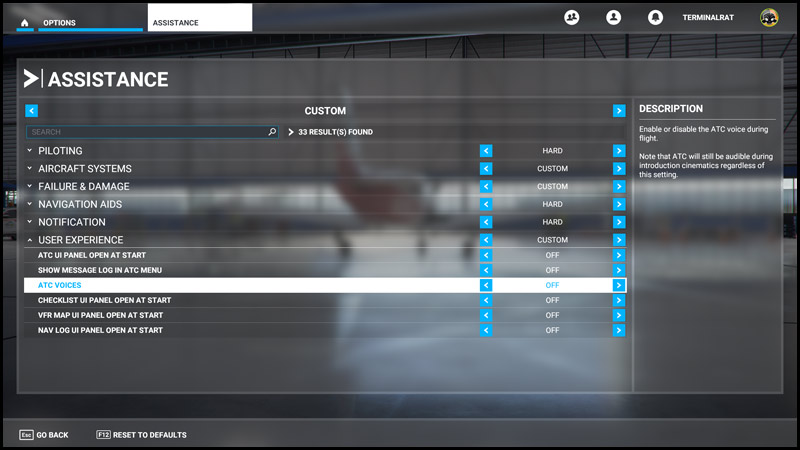
Click "Apply & Save" once "AI Radio Communications (ATC)" and "ATC Voices" have been turned off, then return to the home screen.
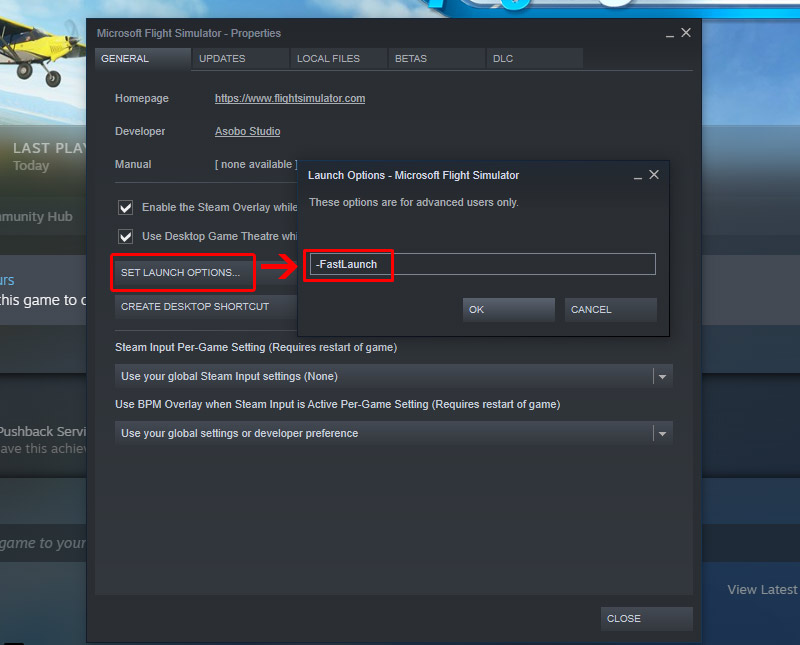
If you purchased MSFS through Steam, a launch option is available to bypass the logo and introductory videos, saving about 45 seconds of the launch process. If you wish to activate this option:
- Open Steam.
- Right-click on MSFS in your Steam library, then select "Properties..."
- Under "General", select "Set Launch Options..."
- Add "-FastLaunch" and select "OK".
The next time you launch MSFS, you'll bypass the logo and introductory videos, going directly to the "Press any key..." screen.
Downloading vPilot
Next, download and install vPilot, to connect your simulator to the VATSIM network. We recommend installing the Latest Stable Version if you are shown multiple options.
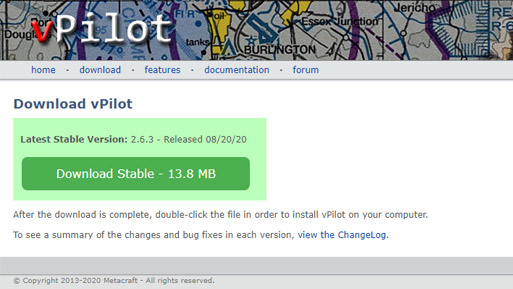
Once the file has downloaded, run the installer. You do not need to specify an installation location.
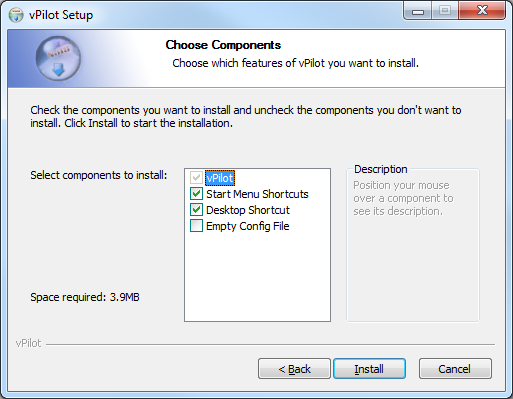
When the installer has completed, check the "Launch vPilot" option, then click "Finish".

Configuring vPilot
If you run MSFS in full screen mode, you may wish to run vPilot on a second, networked computer. This allows you to interact with vPilot without having to change screens on your flying computer. Click here for more information on running vPilot on a remote computer.
Once vPilot is installed, run it. There are a few initial settings to configure in vPilot before connecting to the network for the first time.
Click "Settings":

In the "Settings" dialog, on the "Network" tab, enter your personal VATSIM credentials, including your CID, password, name, and home airport. The VATSIM server will be automatically selected by the system.
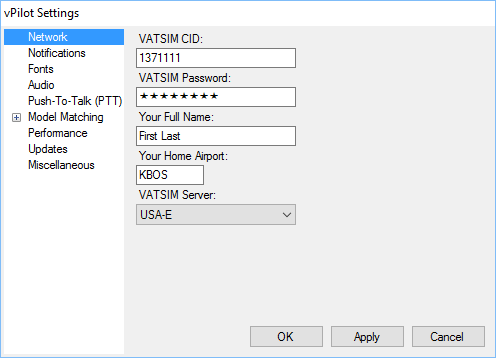
We encourage pilots to select their desired options on the "Notifications" tab. For more information on these settings, visit vPilot's Documentation.
Next, click the "Audio" tab.
On this tab:
- Select the "Microphone Device" (this is the microphone you will use to talk to ATC).
- Select your "Output Device" (this is the device you wish to hear ATC through).
- Leave "Disable realistic ATC effects" unchecked.
- Set your "Mic Volume" slider so that the bar bounces into the green band as you speak in a normal voice.
- Click "Apply".
Once you have completed the settings above, the window should look like this:

Next, click the Push-To-Talk (PTT) tab to set a button or joystick/yoke key that can be used to talk to ATC. To do so, click the "Set new PTT Key or Button" button, then activate the key or button you wish to use as a PTT. You can set a keyboard key, or use a joystick/yoke command button.
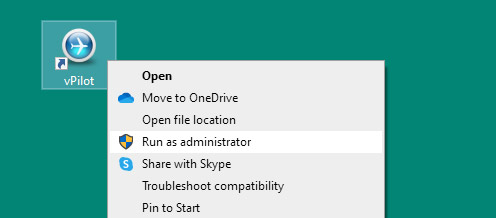
Please note that if you run MSFS or other programs 'as administrator', and you are using a keyboard PTT key, you should also run vPilot 'as administrator'. Otherwise, the PTT keystrokes may not be read by vPilot.
Model Matching
Model matching rules are free add-on installations, which enable you to see other aircraft on VATSIM as they were intended (as their proper aircraft types and even correct airline liveries), instead of seeing them all as default aircraft. The most current and popular MSFS model matching solution is provided by FS Live Traffic Liveries (FSLTL). To get started, first navigate to the FlyByWire Simulations website and download their custom-built installer.

Once the download has completed, run the setup executable file, which should add the installer to your computer's desktop and start menu. Then, run the installer and select the FSLTL radar icon. For our purposes, we only want to install the "FSLTL Traffic Base Models." Because of large file sizes, the package will take a few minutes to install. There is additional functionality available through FSLTL's Traffic Injector, however, this is intended for offline use and should not be used when flying on the VATSIM network.

Once the Base Models installation has finished, launch vPilot, open the settings panel, select "Custom Rules" located under "Model Matching (MSFS)", then select "Add Custom Rule Set(s)..."

This will open a pop-up prompting you to select a model matching rule set file (.vmr file). To select the FSLTL rule set file, navigate to your MSFS Community folder, open the "fsltl-traffic-base" folder, and select the "FSLTL_Rules.vmr" file. Your MSFS Community folder is located under MSFS' AppData. If you aren't sure how to navigate there, you can also search your PC for "fsltl-traffic-base". Once you've finished this, select "OK" in vPilot settings, and your model matching setup is complete!

If you wish to skip model matching installation, you will still be able to connect to VATSIM and participate with ATC.
Scenery
BVA air traffic controllers issue instructions based on current charts and airport diagrams, so it’s important your simulator’s scenery database matches current charts. There are a number of great scenery packages available online for our featured airports.
At a minimum, you should install one of the following scenery options for Boston Logan, our main airport:
- Freeware (available on Flightsim.to for no charge) - download here.
- For US$19, you can purchase an excellent rendition of KBOS from developer FlyTampa - see details here.
You only need one of these two options.
We also recommend free and paid scenery updates for many of our other airports. You can find them all on Page 18 of our Airspace Briefing Guide.
Finally, MSFS pilots may consider purchasing JustFlight's Real Taxiways add-on, which corrects taxiway signage and placement for thousands of airports with a single purchase and without needing to download specific scenery packages for each airport.
Navigation Data
Navigation data (navdata) consists of waypoints (intersections/fixes), navaids (VOR, NDB, etc.), and terminal procedures (SIDs, STARs, and IAPs).
Navdata updates can include new terminal procedures (sids/stars/IAPS) and/or new RNAV/GPS or conventional routes. These revisions and additions are provided to the world on a 28-day cycle known as an Aeronautical Information Regulation And Control, or AIRAC, cycle. At the time of writing (January 2024), the current AIRAC cycle was 2401, effective January 25, 2024. The next update date was February 22, which would be 2402.
Microsoft Flight Simulator (MSFS) is the only simulator that continuously updates navdata to reflect real-world changes, however, these updates are not as frequent as if you update using third-party providers. The default navdata available in the simulator also includes several missing or incorrect waypoints. As a result, by using default navdata, you may not see waypoints that are being used by air traffic controllers. In addition to the simulator's database, some in-sim aircraft have their own navdata that require updates - the default simulator updates will not update these aircraft databases.
Payware flight simulation add-on company Navigraph offers an update service for MSFS. The service adds missing airports, procedures, and updates more than 70,000 enroute waypoints. For more information and instructions for getting started, visit the Navigraph website.
Obtaining Credit
This section applies to BVA members who wish to receive credit for completion of this pre-flight. If you're not a BVA member, you can join today for free to get access to 30+ WINGS training flights, our Discord, TeamSpeak, and more.
By now, you may have joined BVA's community TeamSpeak server. If not, you can find connection instructions and details on our Social page. To get credit for this WINGS Pre-Flight, connect to the TeamSpeak server. When you first connect, you will be sent a message from a bot that prompts you to link your BVA account with your TeamSpeak user profile. Successfully doing so will also result in the issuance of your credit for this pre-flight.
In the next pre-flight, we will connect to the VATSIM network, file a flight plan, and more! Click to move on to WINGS Pre-Flight Part 3.
Microsoft Flight Simulator (2020) players flew over 3.5 billion miles in the first four months of the game’s release (souce: Guide Stash).
At the completion of this pre-flight checklist, you will:
- Have configured your flight simulator's settings for optimal use, in preparation for connecting to the VATSIM network, to include updating your navdata.
- Understand the basics of airport scenery, and have scenery to Boston Logan Airport (BOS) installed.
- Have downloaded, installed, and configured a VATSIM pilot client.
